Homemade Sweet Sourdough Loaf
Highlighted under: Oven-Kissed Treats
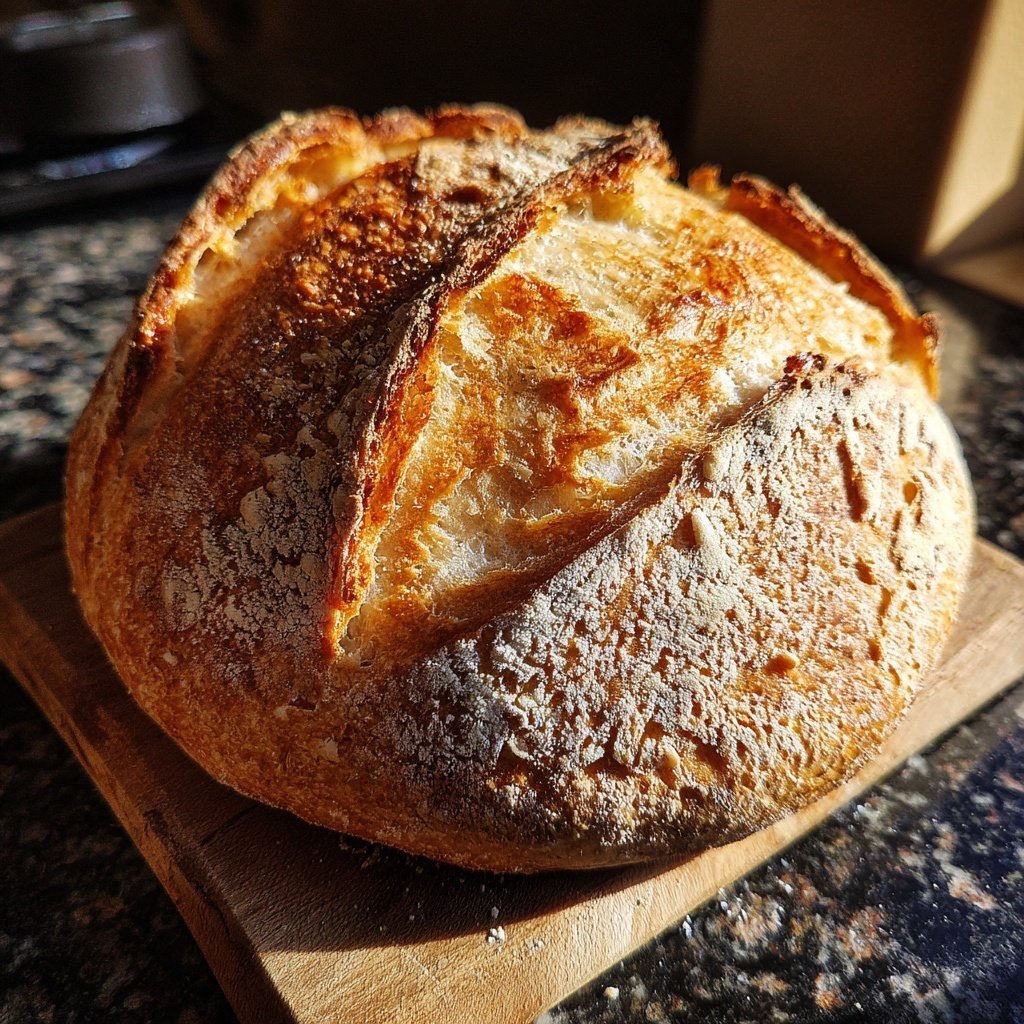
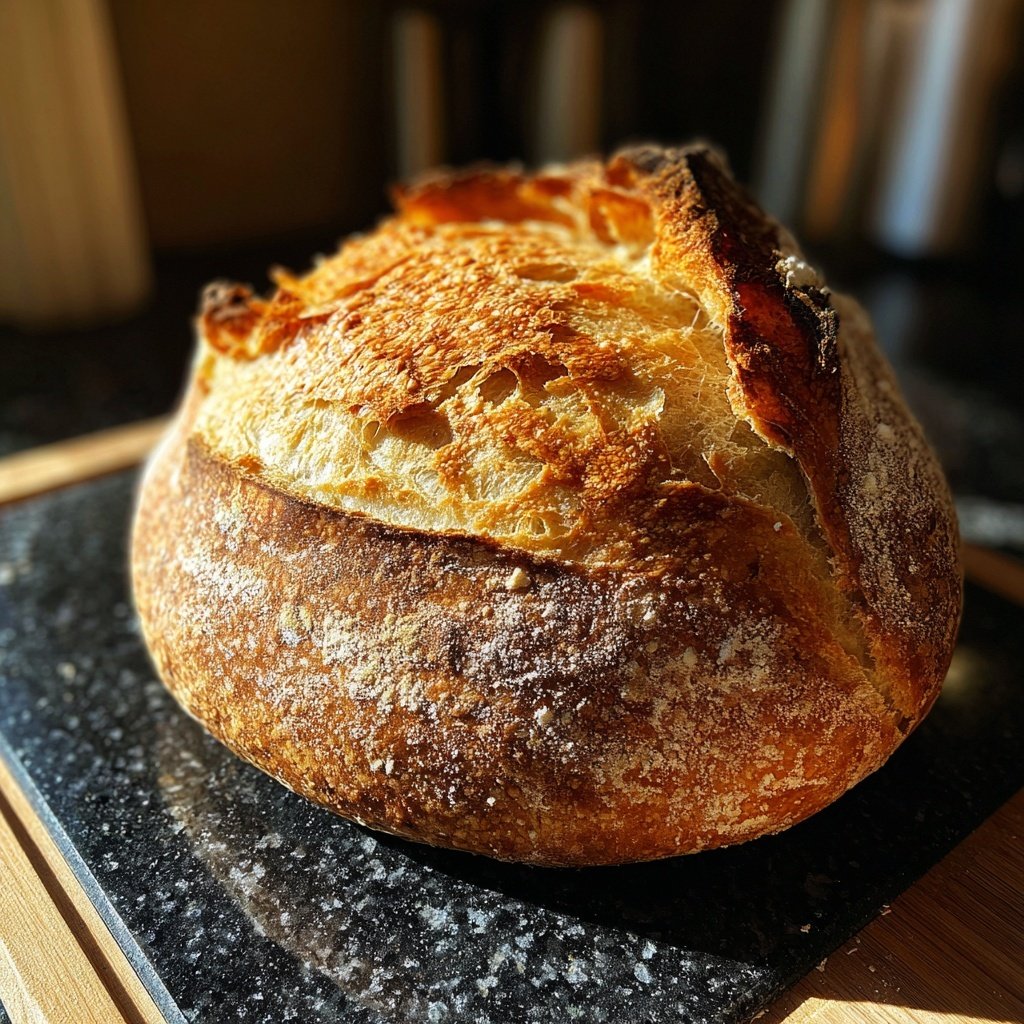
I absolutely love baking my own bread, and this Homemade Sweet Sourdough Loaf has become my go-to recipe. The process of creating the perfect sourdough starter and watching it develop into something magical is so rewarding. I enjoy the balance of sweetness and tanginess in this loaf, which makes it perfect for breakfast toast or an afternoon snack. Every bite is soft, fluffy, and full of flavor. Plus, the crust gets a delightful crunch that adds to the overall experience. If you're a bread enthusiast like me, you'll definitely want to try this!
Baking this sweet sourdough loaf was quite the journey! I initially struggled with the sourdough starter, but after several tries, I finally got it right. The key was to ensure it was bubbly and active before using it in my recipe. Each fermentation step seemed to enhance the flavor and texture, making the final loaf nothing short of divine.
What I appreciate the most about this process is the patience it requires. It might take some time, but the aroma that fills my home while the loaf bakes is worth every minute. The hint of sweetness balances the natural tang of the sourdough perfectly, creating a delicious bread that my family and friends rave about!
Why You'll Love This Recipe
- A perfect blend of sweet and tangy notes in every slice.
- The crust has a satisfying crunch that contrasts with the soft interior.
- Freshly baked with natural ingredients, making it healthier than store-bought options.
The Importance of a Strong Sourdough Starter
Creating a robust sourdough starter is crucial to the success of your Homemade Sweet Sourdough Loaf. The starter not only provides the leavening needed for the dough to rise but also contributes flavor complexity. An active starter should be bubbly and have a pleasant tang; if yours isn't showing these signs after 8 hours, you might need to feed it more frequently or ensure it’s kept at the right temperature (ideally around 75°F/24°C).
When mixing your sourdough starter, remember that the quality of your flour matters. Using organic or high-protein bread flour can enhance the fermentation process, resulting in lighter textures and more pronounced flavors. If you're short on time or ingredients, a quick boost can be achieved by mixing in a tablespoon of sugar to feed the yeast, but this should be a rare exception.
Mastering the Dough Texture
Achieving the perfect dough texture is essential for your sourdough bread. When kneading the dough, you’re looking for a smooth, elastic consistency that springs back when poked. This usually takes about 10 minutes on a floured surface. If the dough feels too sticky, don’t hesitate to incorporate a little more flour, but be cautious; adding too much can result in a dense loaf.
Once the dough has risen, check its readiness by performing the 'poke test.' Gently press a finger into the dough; if the indentation slowly springs back, it’s ready to be shaped. If not, let it rise for an additional 30 minutes before shaping to ensure a nice, puffy loaf.
Tips for Storing and Serving Your Bread
After baking, it's essential to let your Homemade Sweet Sourdough Loaf cool completely before slicing. This waiting period allows the interior to set properly, ensuring your slices are soft yet sturdy enough for spreading toppings. To store it, wrap the loaf in a clean kitchen towel and place it in a bread box at room temperature. If you plan to keep it for more than a couple of days, consider freezing it to maintain its freshness.
For serving, this loaf is incredibly versatile! Enjoy it simply with butter or experiment with your favorite toppings like fruit preserves or cream cheese. If you want to turn it into a complete meal, try making French toast or a savory bread pudding. Don't hesitate to get creative with your toppings; the sweet and tangy flavor pairs beautifully with a variety of flavors.
Ingredients
Gather these ingredients before you start baking:
For the Sourdough Starter
- 100g all-purpose flour
- 100g water
- 50g active sourdough starter
For the Dough
- 500g bread flour
- 300g water
- 100g sugar
- 10g salt
- 200g active sourdough starter
- 1 tablespoon honey
- 50g melted butter
Ensure everything is at room temperature before starting.
Instructions
Follow these steps to create your perfect loaf:
Prepare the Sourdough Starter
In a bowl, mix 100g of all-purpose flour, 100g of water, and 50g of your active sourdough starter. Cover it with a damp cloth and let it sit at room temperature for about 8 hours, until it's bubbly.
Mix the Dough
In a large mixing bowl, combine 500g of bread flour, 300g of water, 100g of sugar, 10g of salt, the bubbly sourdough starter, 1 tablespoon of honey, and 50g of melted butter. Mix until a shaggy dough forms.
Knead the Dough
Transfer the dough to a floured surface and knead for about 10 minutes, until smooth and elastic. Place the dough in a lightly greased bowl, cover it, and let it rise for 4 hours.
Shape the Loaf
After the dough has risen, gently punch it down and shape it into a loaf. Place it in a greased loaf pan, cover it, and let it rise for another 2 hours, or until puffy.
Bake the Bread
Preheat your oven to 425°F (220°C). Bake the loaf for 30 minutes, or until golden brown. Let it cool before slicing to enjoy.
Enjoy your fresh, homemade sourdough loaf with your favorite toppings!
Pro Tips
- For an extra crusty loaf, place a pan of water at the bottom of your oven while baking. This creates steam that helps develop a beautiful crust.
Common Mistakes and Fixes
One common issue when baking sourdough is undervaluing the power of fermentation. If your bread isn’t rising as expected, check the temperature of your environment. Sourdough thrives in warm conditions; anything under 70°F (21°C) can slow the fermentation process significantly. If your kitchen is cool, try placing the dough near a warm oven or using a proofing box.
Another common pitfall is rushing the rising times. Each dough is different and can vary based on the strength of your starter, the temperature of your space, and even the humidity levels. If your dough doesn't seem to double in size, offer it more time; patience is key for developing the best flavor and texture.
Adaptations for Special Diets
If you’re looking for a gluten-free version of this loaf, you can substitute the all-purpose flour and bread flour with a gluten-free blend that contains xanthan gum. Just keep in mind that the dough might behave differently, so expect a denser texture and adjust your water content accordingly to maintain hydration. Adding an extra tablespoon of honey can also enhance flavor if you find gluten-free loaves to be lacking.
For a dairy-free alternative, replace the melted butter with an equal amount of coconut oil or a vegan butter substitute. This will still provide richness while ensuring that those who are avoiding dairy can enjoy this homemade treat. Additionally, incorporating nuts or seeds into the dough can add texture and flavor; just remember to adjust the overall flour content slightly to accommodate.
Scaling Up or Down
This recipe is easily scalable, whether you want to make a small loaf for yourself or a large batch for a gathering. Simply keep the ratio of the ingredients consistent. If you're doubling the recipe, consider using a larger mixing bowl and ensuring your rising space has sufficient room at higher volumes, which can lead to faster rising times due to increased warmth from more dough.
When scaling down, remember that smaller loaves tend to bake faster. Keep an eye on the crust color; smaller loaves may only need 20-25 minutes of baking. Adjustments might also be necessary with rising times, as smaller quantities can ferment and rise more quickly, so always perform the poke test to ensure doneness.
Questions About Recipes
→ Can I use whole wheat flour instead of bread flour?
You can, but it may change the texture and flavor. Try mixing half whole wheat and half bread flour for a balanced result.
→ How do I store this bread?
Once cooled, wrap the loaf in plastic wrap and store it at room temperature. It should last for about 3-4 days.
→ Can I freeze this sourdough loaf?
Absolutely! Simply wrap it tightly in plastic wrap and then foil, and it can be frozen for up to 3 months.
→ What can I serve with this bread?
This sweet sourdough loaf pairs beautifully with butter, jams, or even as a base for sandwiches.
Homemade Sweet Sourdough Loaf
Created by: Lillian Hayes
Recipe Type: Oven-Kissed Treats
Skill Level: Advanced
Final Quantity: 1 loaf
What You'll Need
For the Sourdough Starter
- 100g all-purpose flour
- 100g water
- 50g active sourdough starter
For the Dough
- 500g bread flour
- 300g water
- 100g sugar
- 10g salt
- 200g active sourdough starter
- 1 tablespoon honey
- 50g melted butter
How-To Steps
In a bowl, mix 100g of all-purpose flour, 100g of water, and 50g of your active sourdough starter. Cover it with a damp cloth and let it sit at room temperature for about 8 hours, until it's bubbly.
In a large mixing bowl, combine 500g of bread flour, 300g of water, 100g of sugar, 10g of salt, the bubbly sourdough starter, 1 tablespoon of honey, and 50g of melted butter. Mix until a shaggy dough forms.
Transfer the dough to a floured surface and knead for about 10 minutes, until smooth and elastic. Place the dough in a lightly greased bowl, cover it, and let it rise for 4 hours.
After the dough has risen, gently punch it down and shape it into a loaf. Place it in a greased loaf pan, cover it, and let it rise for another 2 hours, or until puffy.
Preheat your oven to 425°F (220°C). Bake the loaf for 30 minutes, or until golden brown. Let it cool before slicing to enjoy.
Extra Tips
- For an extra crusty loaf, place a pan of water at the bottom of your oven while baking. This creates steam that helps develop a beautiful crust.
Nutritional Breakdown (Per Serving)
- Calories: 300 kcal
- Total Fat: 8g
- Saturated Fat: 5g
- Cholesterol: 20mg
- Sodium: 150mg
- Total Carbohydrates: 52g
- Dietary Fiber: 2g
- Sugars: 10g
- Protein: 8g